Shellybrody
18 March 2020 02:03I really like your writing style, excellent information, regards for posting :D.

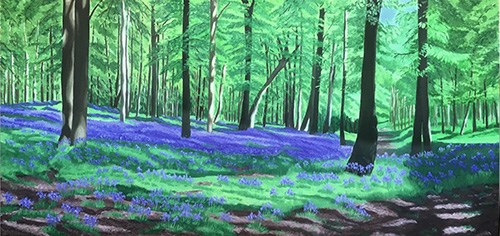
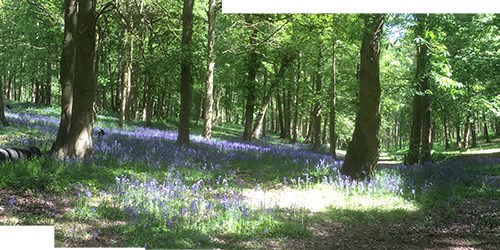
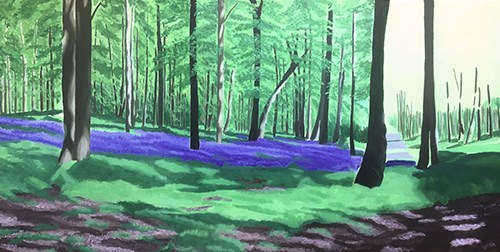
The first 'Bluebell Woods' was painted as a commission piece for the lovely people we are renting a flat from while we renovate a bungalow for our new home, they own and maintain these woods and I often walk through them as they are just a few yards from where I'm living. When it was finished I decided to paint another one for our new home - just need the building to be finished so I somewhere to hang it ! The woods were so beautiful in the Spring when the bluebells were flowering and I took many photos, searching for the best view. I eventually decided on this one, I liked the path between the trees leading the viewer into the painting, the sweep of bluebells down the slope from left to right and, most importantly the play of light and dark as the sun shone through the trees from the right. The painting is 4ft by 2 ft (oil on canvas) so I had to put several photos together.
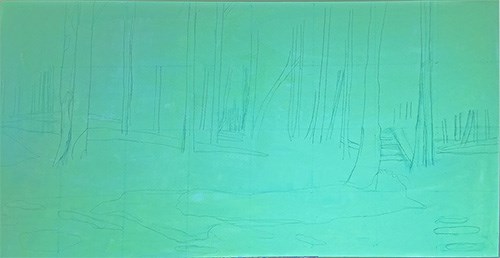
Stage 1 Drawing:
I almost always start a painting by covering the canvas with a single colour, using the main colour of the scene - in this case a green, this tones down the glaring white and provides a background colour which is much easier to judge tone and colour against than white. Then I make a rough drawing, taking care to get proportions and placement correct. The actual painting is a much lighter green, I had to enhance the photo so you can see the drawing.
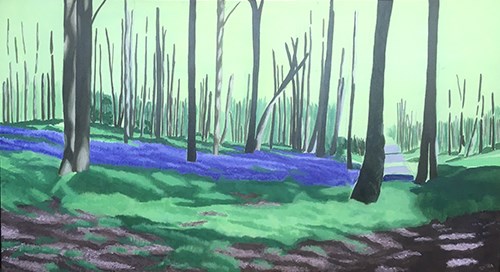
Stage 2 Colour/Tone Blocking:
Next I start putting in blocks of colour using a large brush, it's important not to get too picky at this stage. What I'm trying to do is establish the main areas of colour and crucially get the tones right. I'm not too concerned that the colours are accurate at this stage. The success of a painting like this rests mainly on the play of light, to get the effect of light through the trees I need to establish the lights and darks early on. Don't be afraid to make the darks really dark and the lights really light, probably more exaggerated than the original photo, if you overdo it you can always correct later, but it's much easier if the contrast is well established than if it's wishy washy.
Colours I used: zinc white, permanent green, permanent yellow medium, lemon yellow, ultramarine blue, burnt sienna. For the bluebells: cobalt blue with a touch of permanent violet medium.

Stage 3 Painting the Main Areas:
So now I'm starting to paint the main areas with more detail, but not overdoing it yet. It's important not to get carried away on a small area, but to paint the whole painting at each level of detail. As this is a large painting I will paint it in stages, for a smaller painting I would be painting it much more as a whole. I'm also now being much more accurate with colour. I started on the areas of brown bark chipping at the bottom of the painting, then laid in the colour for the grass areas and the bluebells and roughly painted the trees. I'm taking care to make sure I get the tones right, standing back often to see it from a distance to make sure I'm maintaining the contrasts properly.
Stage 4 Painting the Background Trees:
Next I'm painting in the background trees, again looking at tones to get the feel for the light coming through the trees. I'm also looking at the shapes that are emerging, it's impossible to paint every leaf so you need to paint an impression of massed leaves, following the photo in general but making sure the shapes work. Someone once said, or I read it somewhere, 'you're not copying a photo, you're painting a picture' and I think of this every time I paint. So feel free to change things, add more trees where it works, beef up the contrasts, whatever the painting needs. Step back frequently and check the painting as a whole and identify areas that aren't quite right. Have another look after a few days, any problem areas will be more obvious after not seeing it for a while.
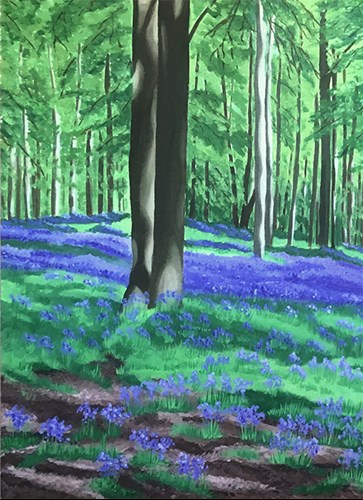
Stage 5 Getting More Detailed:
Now I'm finishing the background trees and starting to add more detail to the foreground. I'm also going over the trees to add more light and shade where I feel it needs it. I've left some areas to the right as I need to let the paint dry before I can paint the branches over the sky and the lighter leaves on the tree to the right. This is my favourite stage, when you can really see the painting coming together.

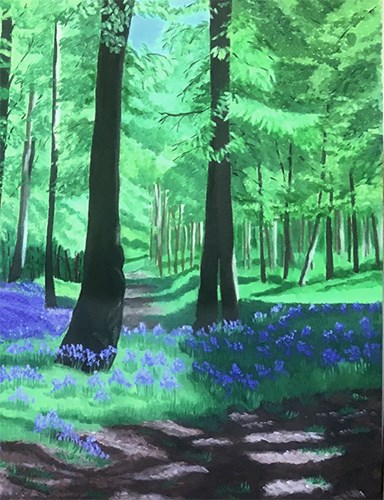
Stage 6 The fine Details:
Now I can get really detailed. I've completed the trees on the right, added more detail to the rest of the trees and painted in some branches. I've finished the path, making it narrower and more like a woodland path than a path in a park. I can at last paint the foreground bluebells, adding stems, their base leaves and more tufts of grass. I've taken a fan brush and gone over the sweep of bluebells with both a lighter and darker colour to add variation.
I hope this was useful to you, I love to hear your comments, you can add one below.
I really like your writing style, excellent information, regards for posting :D.